Today we are learning how to propagate Lilliums. Before we start, we learn about the differences between the types of bulbs. True bulbs like Daffodils, Alliums, Tulips etc.... are known as 'tunicate' bulbs. These look like an onion when cut in half with a base plate (a modified stem) at the bottom where the roots come out from and where the fleshy onion like layers of the bulb (modified leaves) attach to. To the side of the base plate is where small offshoots (called bulblets) will form to create new bulbs.
 |
| Lillium bulb with side bulblets that have started to shoot. |
 |
| Marcus runs us through the procedure before we start. |
Propagating Lilliums is a process known as 'Vegetative Propagation' where a section of the vegetation of the plant is used to create a new plant. Best time to do this is in the cooler months from autumn until around mid July. Any later and the bulbs will be starting to shoot. An interesting point about Lilliums bulbs as well, is that they have contractile roots that grow in a manner to anchor the bulb downwards in the soil and counteract the vigorous growth of the stem from pulling the bulb to the surface. Ahh.... nature really has got it all worked out hasn't it!
 |
| Wash the bulb first to reveal the best scales for selection. |
Mix in a little water until the mix feels just damp but definitely not wet. Too wet and they would rot and too dry and they will not have enough moisture to feed the root growth.
Next you take a scalpel and cut a fine sliver off the bottom of the scale to
reveal new flesh that hasn't been burnt by the bleach.
Dip this edge straight into a hormone gel.......
....and then place it in the bag with the mix. Repeat this until you have up to 20 or so in the bag.
 |
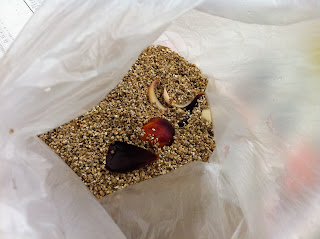
| The finished scales in the mix. |
Lastly and importantly, seal the bag, wrap in silver foil so no light can penetrate and place on the heating and misting bed which sits at around 20 degrees. We label ours M.E.M which stands for Michael, Emma and Mark and the date. We will visit back in 6-8 weeks to check if they have taken. Important points I have gleaned from this lesson include the differences in bulbs and how they grow, the actual propagation process step by step and very importantly, the attention paid to hygiene to give you the best chance of success.
 |
| Our little babies tucked into bed in the nursery. |


No comments:
Post a Comment
Note: only a member of this blog may post a comment.